How to set up an ONVIF camera video stream on the Secure Display Station
How to set up an ONVIF camera video stream on the Secure Display Station
Overview
Most professional IP cameras on the market are ONVIF-conformant. With support for ONVIF discovery and profiles S and T, the Secure Display Station offers a convenient way to quickly setup video streams, even for first-time users.
Prerequisites
- Access to the Secure Display Station web interface (USB mouse/keyboard or network device)
- ONVIF user credentials for the cameras
- Configured video settings (framerate, codec, bitrate, ...) on each camera
Steps
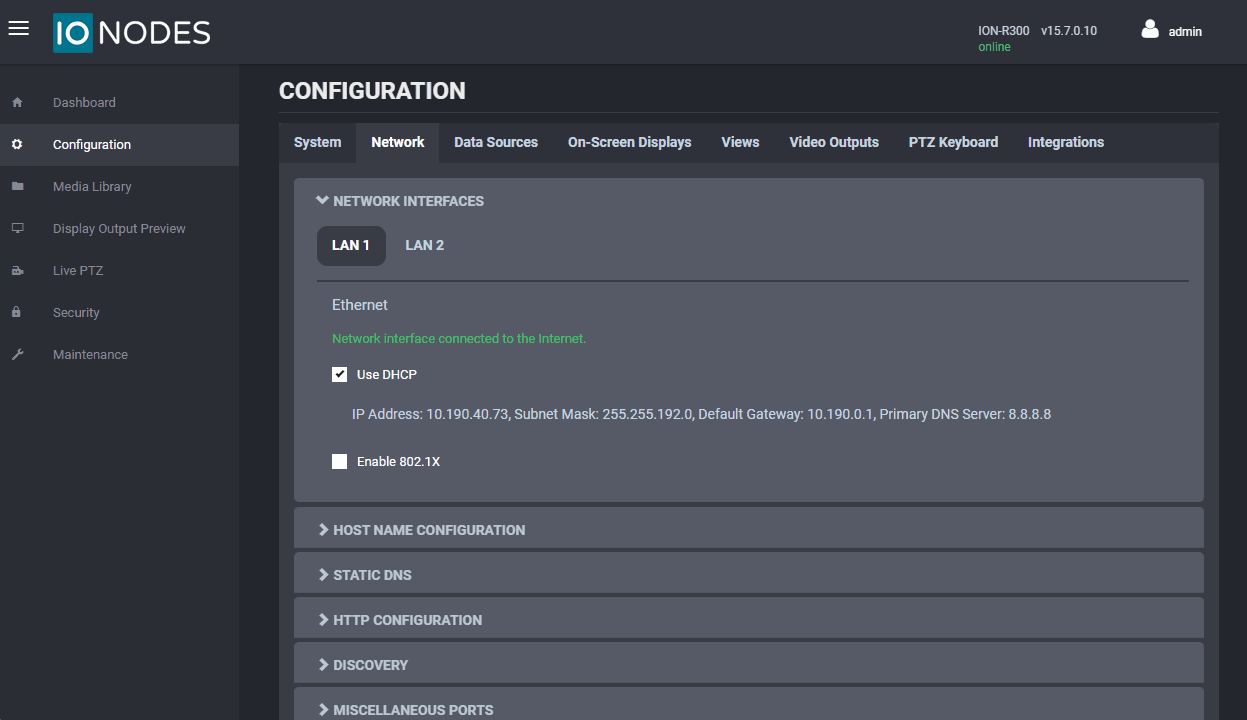
1. Verify Network Settings
- Log in to your Secure Display Station
- Go to Configuration → Network
- Ensure the device can reach cameras via HTTP and RTSP
- DHCP is enabled by default
- If needed, disable DHCP to configure a static IP
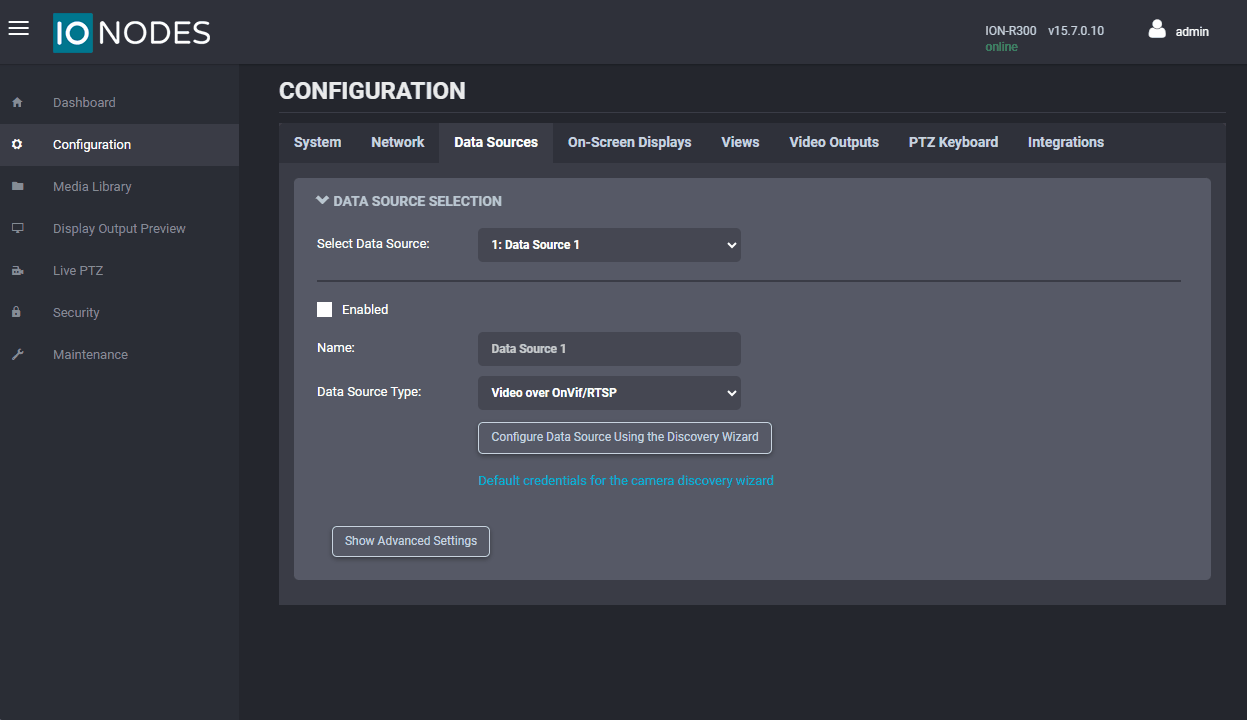
2. Add Cameras (Data Sources)
- Go to Configuration → Data Sources
- Select a Data Source
- Confirm type is Video over ONVIF/RTSP
- Click the Discovery Wizard
- Select your camera from the list
- Enter ONVIF credentials and click Next
- Choose a video profile
- Set transport mode (Unicast Only is recommended unless multicast is required)
- Click Done
- Repeat for each camera (use a different Data Source each time)
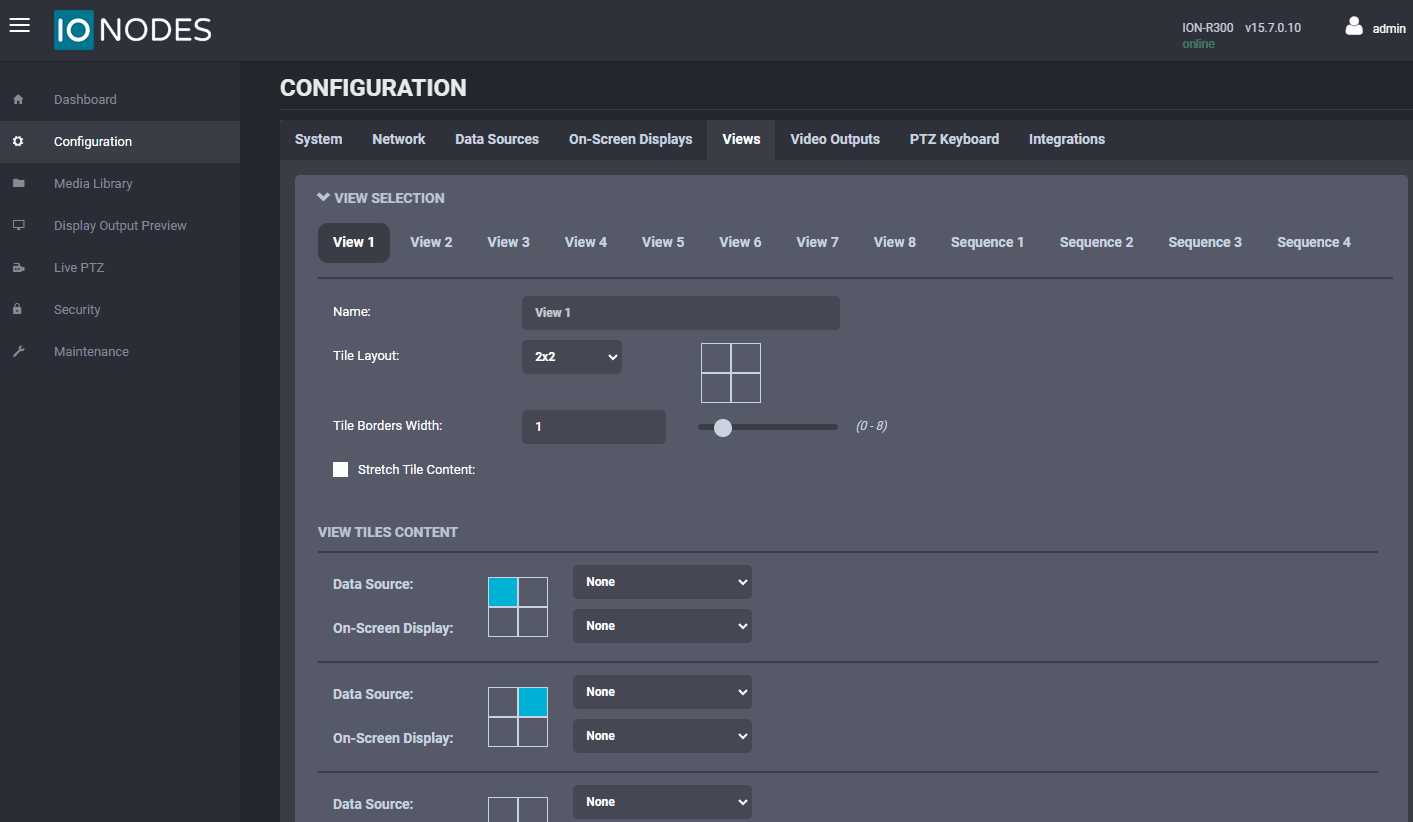
3. Configure Views
- Go to Configuration → Views
- Select a view (View 1 by default), and optionally edit its name
- Choose a Tile Layout
- Assign a Data Source to each tile
- Repeat to create additional views (up to 8)
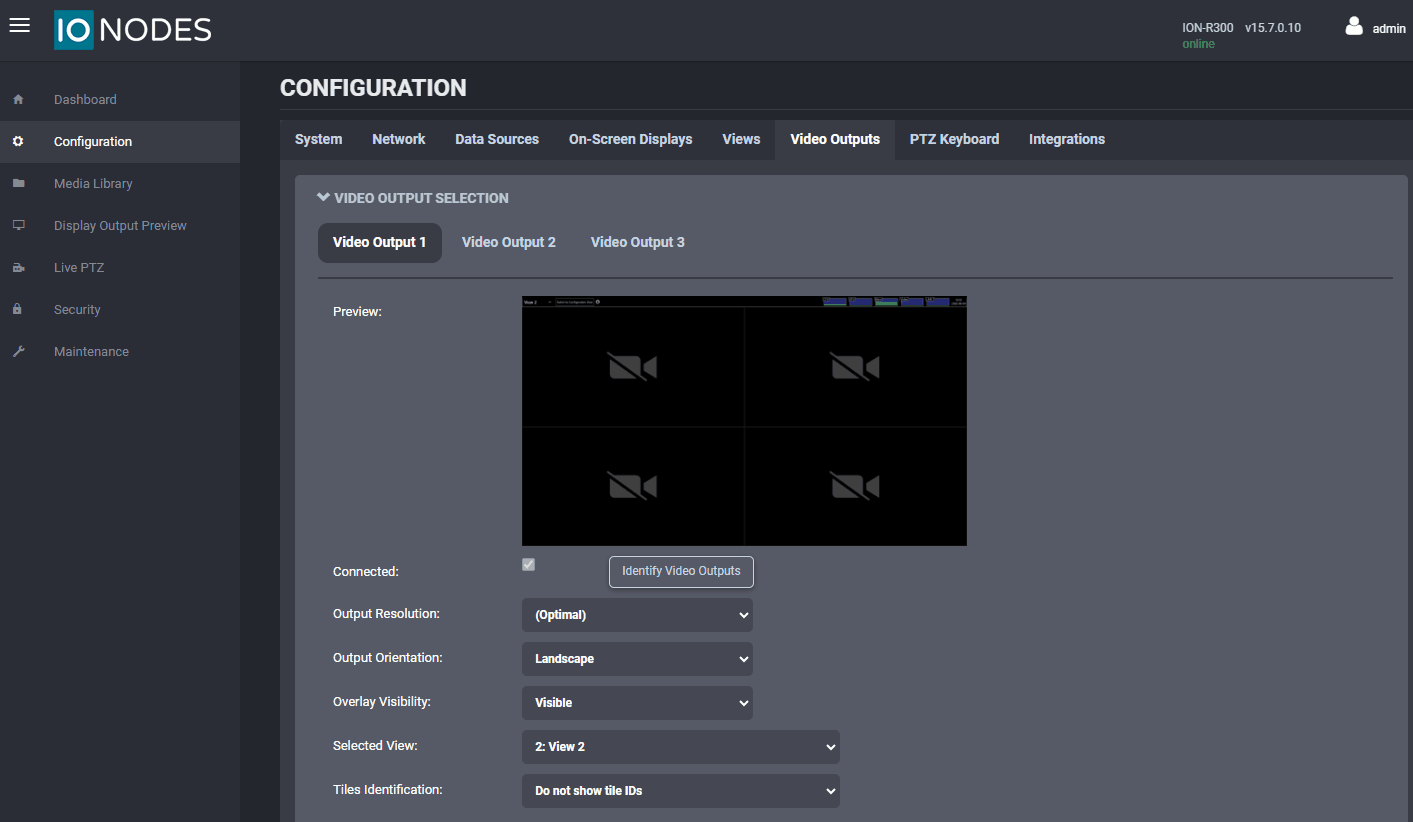
4. Assign Views to Outputs
- Go to Configuration → Video Outputs
- Select a video output (if applicable)
- Assign a view
- Repeat for all output
5. Finalize Display
- Confirm system resources (CPU, GPU, Memory) are within limits
- Set Overlay Visibility → Auto-Hide to remove resource graphs from display